Deploy a Ruby On Rails application with Coolify
Coolify is the perfect open-source solution for easily deploying Ruby on Rails apps through self-hosting, at a low cost and with great flexibility.

Introduction
Heroku was once the go-to solution for deploying a Ruby on Rails application quickly and for free. But in November 2022, everything changed: the platform removed its free plan, making all its services paid, even for small projects.
Following this announcement, several competitors like Fly.io emerged with limited free plans. But they eventually followed the same path, gradually removing their free offerings.
As an Indie Hacker in my spare time, I faced a major issue: how can I keep all my projects online at a low cost? Especially since none of my projects generate any revenue…
On top of that, there’s the legal challenge: my projects target a French audience, so I need to comply with GDPR. However, most PaaS providers host their data in the United States, which creates a compliance issue for European users.
The solution? Self-hosting
Given this situation, one alternative stands out: hosting applications yourself (aka self-hosting). On a server, no matter how many resources you use, the cost remains the same. Most importantly, you retain full control over your data.
Basically, I love “plug & play” solutions, so when I first heard about self-hosting, it didn’t seem appealing to me. I associated “self-hosting” with setup complexity, security concerns, proxies, etc. And, above all, I’m a developer, not a network architect 😅
So I wondered: is it possible to self-host without struggling with configuration?
In the Rails ecosystem, there are tools like Capistrano or, more recently, Kamal, that help with application deployment. But these tools only simplify one part of the deployment process and mainly rely on configuration files.
What I want is as little configuration as possible and an interface that allows me to manage all my projects on my server.
That’s when I discovered Coolify, a simple-to-set-up alternative (hello plug & play 👋) that meets all my needs.
What is Coolify?
Coolify is an open-source, free alternative to PaaS providers like Heroku. It allows you to easily deploy almost any application, regardless of the technology used. The strength of Coolify is that it is based on Docker: each of your applications will be deployed in a container, and you can manage them through an interface.
You have two options to use it: cloud mode ($5/month) or self-hosted mode. Personally, I chose to self-host Coolify on a VPS from Hostinger with a KVM2.
If you want to secure and configure your VPS before installing Coolify, I recommend this video: Set up and Secure Your Own Server. For the Coolify installation, Syntax has made an excellent video guide: Coolify Crash Course.
Deploying a Ruby on Rails Application
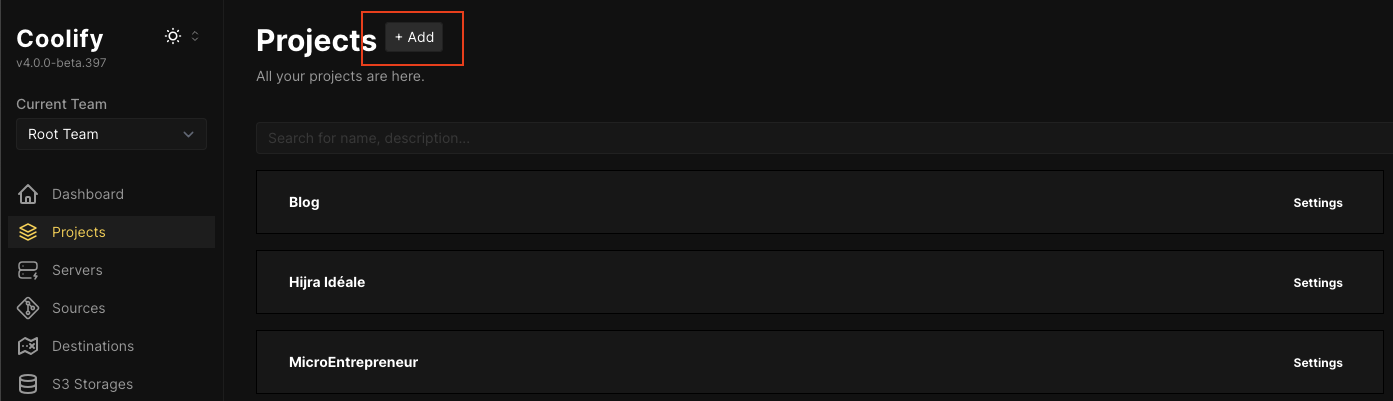
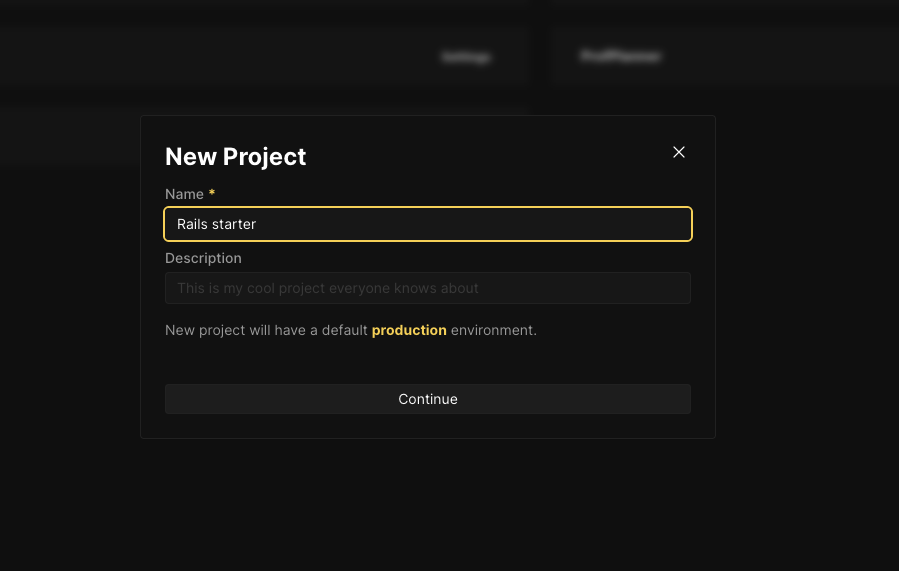
Creating a New Project and an Environment
Setting Up the Database
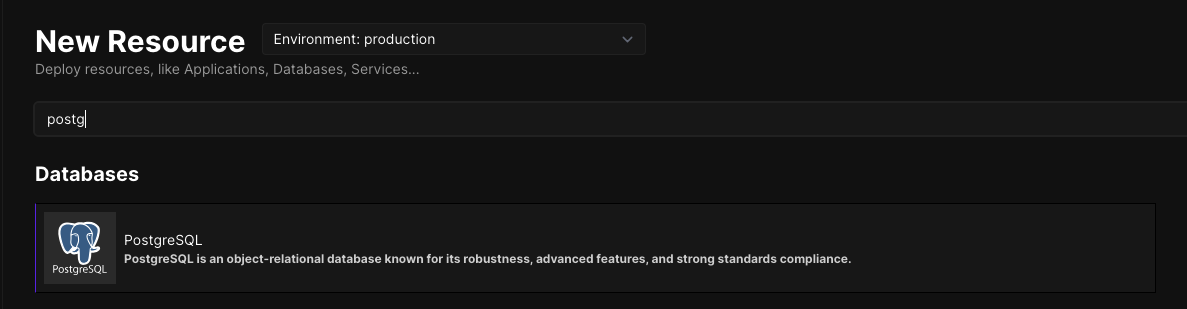
Creating a database in an environment is simple: just add a resource by searching for your database system (PostgreSQL, MySQL, etc.). 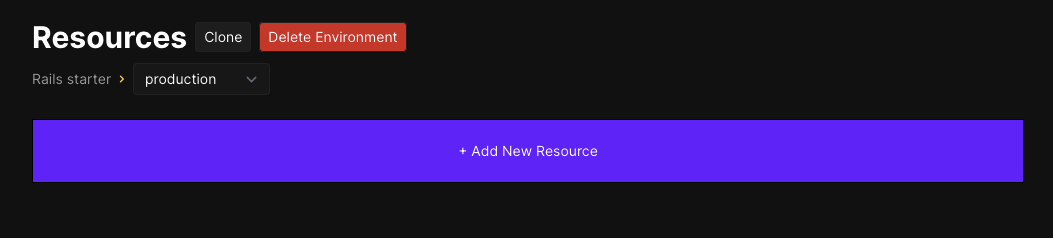
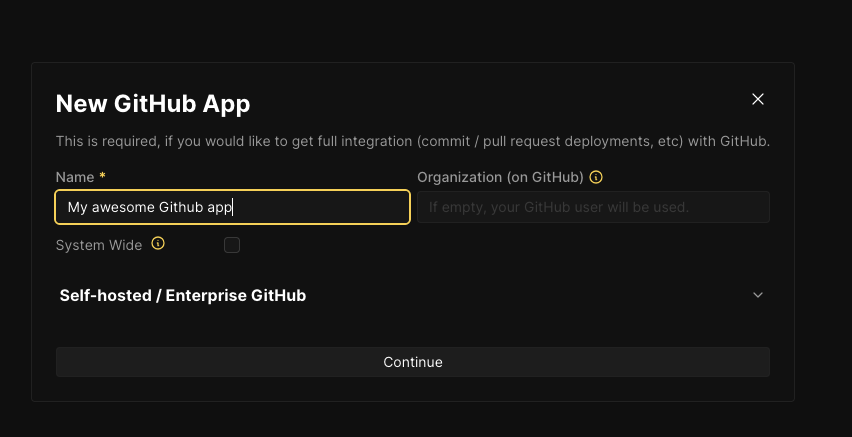
Deploying with GitHub
For Coolify to deploy your project, you first need to create a GitHub app to access your repositories. This can be done directly from the “Sources” menu. 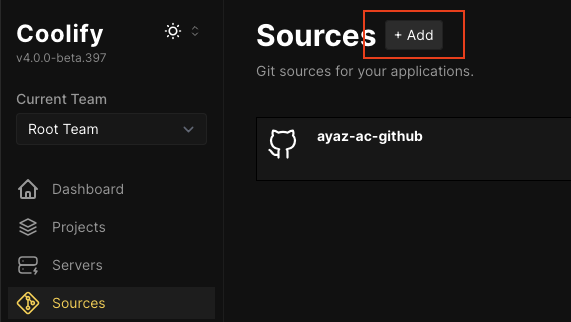
Deploying an Application
Just like your database, an application is also considered a resource in Coolify. 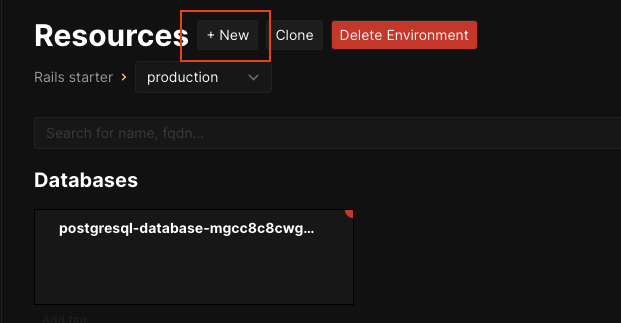
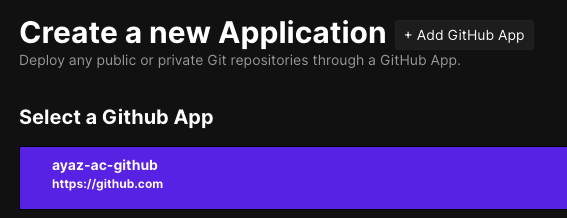
To fetch your project from GitHub, select “Private Repository (with GitHub App)” from the list of services. Coolify will then clone your repository onto your server. 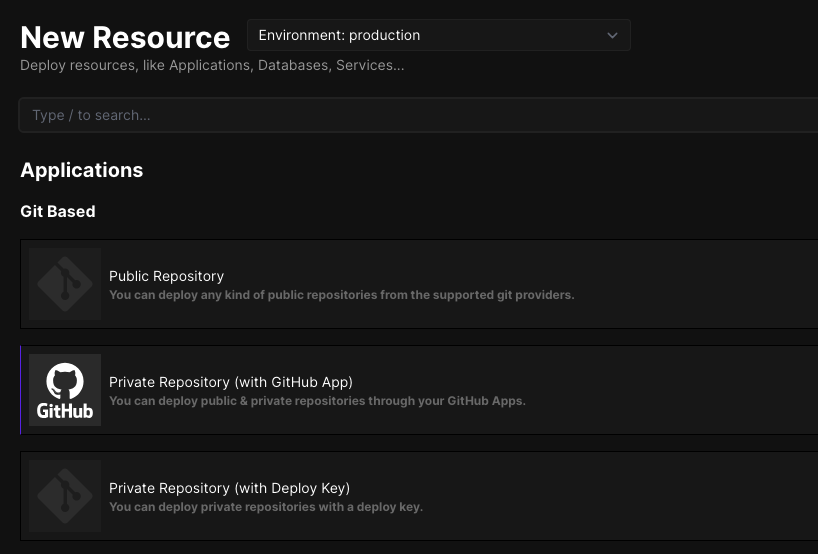
Make sure to select “Dockerfile” in the “Build Pack” so Coolify uses it to deploy your application in a Docker container. 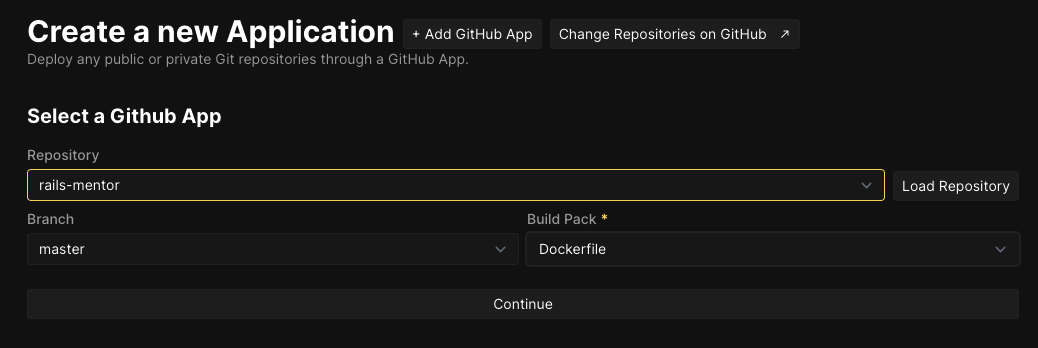
If you don’t have a pre-configured Dockerfile, you can modify the one generated by Rails in recent versions. Be sure to update the Ruby version in the Dockerfile.
1
2
3
4
5
6
7
8
9
10
11
12
13
14
15
16
17
18
19
20
21
22
23
24
25
26
27
28
29
30
31
32
33
34
35
36
37
38
39
40
41
42
43
44
# syntax = docker/dockerfile:1

ARG RUBY_VERSION=3.2.2
FROM docker.io/library/ruby:$RUBY_VERSION-slim AS base

WORKDIR /rails

RUN apt-get update -qq && \
    apt-get install --no-install-recommends -y curl wget libjemalloc2 libvips postgresql-client && \
    rm -rf /var/lib/apt/lists /var/cache/apt/archives

ENV RAILS_ENV="production" \
    BUNDLE_DEPLOYMENT="1" \
    BUNDLE_PATH="/usr/local/bundle" \
    BUNDLE_WITHOUT="development" \
    RAILS_SERVE_STATIC_FILES="1"

FROM base AS build

RUN apt-get update -qq && \
    apt-get install --no-install-recommends -y build-essential git libpq-dev pkg-config && \
    rm -rf /var/lib/apt/lists /var/cache/apt/archives

COPY Gemfile Gemfile.lock ./
RUN bundle install && \
    rm -rf ~/.bundle/ "${BUNDLE_PATH}"/ruby/*/cache "${BUNDLE_PATH}"/ruby/*/bundler/gems/*/.git && \
    bundle exec bootsnap precompile --gemfile

COPY . .

RUN bundle exec bootsnap precompile app/ lib/
RUN RAILS_ENV=production SECRET_KEY_BASE=dummy ./bin/rails assets:precompile

FROM base
COPY --from=build "${BUNDLE_PATH}" "${BUNDLE_PATH}"
COPY --from=build /rails /rails

RUN groupadd --system --gid 1000 rails && \
    useradd rails --uid 1000 --gid 1000 --create-home --shell /bin/bash && \
    chown -R rails:rails db log storage tmp
USER 1000:1000

EXPOSE 3000
CMD ["bash", "-c", "bin/rails db:prepare && bin/rails server -b '0.0.0.0'"]
Environment Variables
Within your application’s resource settings, you can modify environment variables. To deploy your Rails application, you need at least these three:
- DATABASE_URL: Retrieve this value from your database resource (e.g., “Postgres URL (internal)” for PostgreSQL).
- RAILS_ENV: Usually set to
production. - RAILS_MASTER_KEY: Your project’s master key.
Configuring the Domain Name
Inside your application resource settings, you can add domain names. Simply enter the domains that should point to your app, separated by commas.
On the DNS side, add these domains and set your server’s IP as the target.
Going Further
Now that you have a VPS with Coolify, you can leverage it to host multiple services across your projects. A great example is Plausible.
Plausible is a privacy-friendly, GDPR-compliant analytics service. You can either use their cloud version or self-host it for free with Coolify.
Welcome to the World of Self-Hosting
With Coolify, self-hosting applications has never been easier. Since it’s based on Docker, you can install almost any application effortlessly.
I have to warn you: once you start self-hosting, you’ll want to host all your SaaS tools too—trust me, we’ve all been there!
To explore more, check out Awesome Selfhosted.
With Coolify, self-hosting is more affordable, flexible, and hassle-free. Don’t wait—jump in! 😎